DIY Custom Belt Bags: A Fun Craft for My Daughter and I
Disclosure: We only endorse things we’ve personally used or come highly recommended by our clients/friends. If you grab anything we mention using our referral links, we may get a small commission. However, there’s no extra cost to you.


Hello, dear readers! I'm Erika, I'm excited to share a creative and exciting project that I embarked on with my daughter. It's all about crafting unique custom belt bags, and it has been an absolute blast!
But before we dive into the crafty details, let me introduce you to the star of the show – the product that inspired this fun project.
The Must-Have Belt Bag
The product that kickstarted our crafting adventure is this stylish and practical belt bag. It's not just your ordinary bag; it's a versatile accessory that can be worn around your waist, providing convenience and style. Whether you're heading out for a walk, running errands, or going on a cruise, this belt bag is the perfect companion to keep your items close at hand.
Crafty Inspiration Strikes
As a mom, I'm always on the lookout for creative activities to do with my daughter. Crafting is one of our favorite pastimes, and when we stumbled upon this belt bag, we saw it as a blank canvas just waiting to be transformed into something unique and special.
With our minds brimming with ideas, we decided to turn this belt bag into a cute and customized accessory. Our goal was to create something that not only served a practical purpose but also reflected our personal style.
The Crafty Process
Now, let me walk you through the step-by-step process of how we transformed this belt bag into a one-of-a-kind accessory:
Items to Buy
First things first, we gathered all the necessary supplies. Aside from the belt bag, here's what we used:

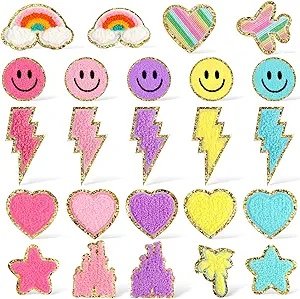
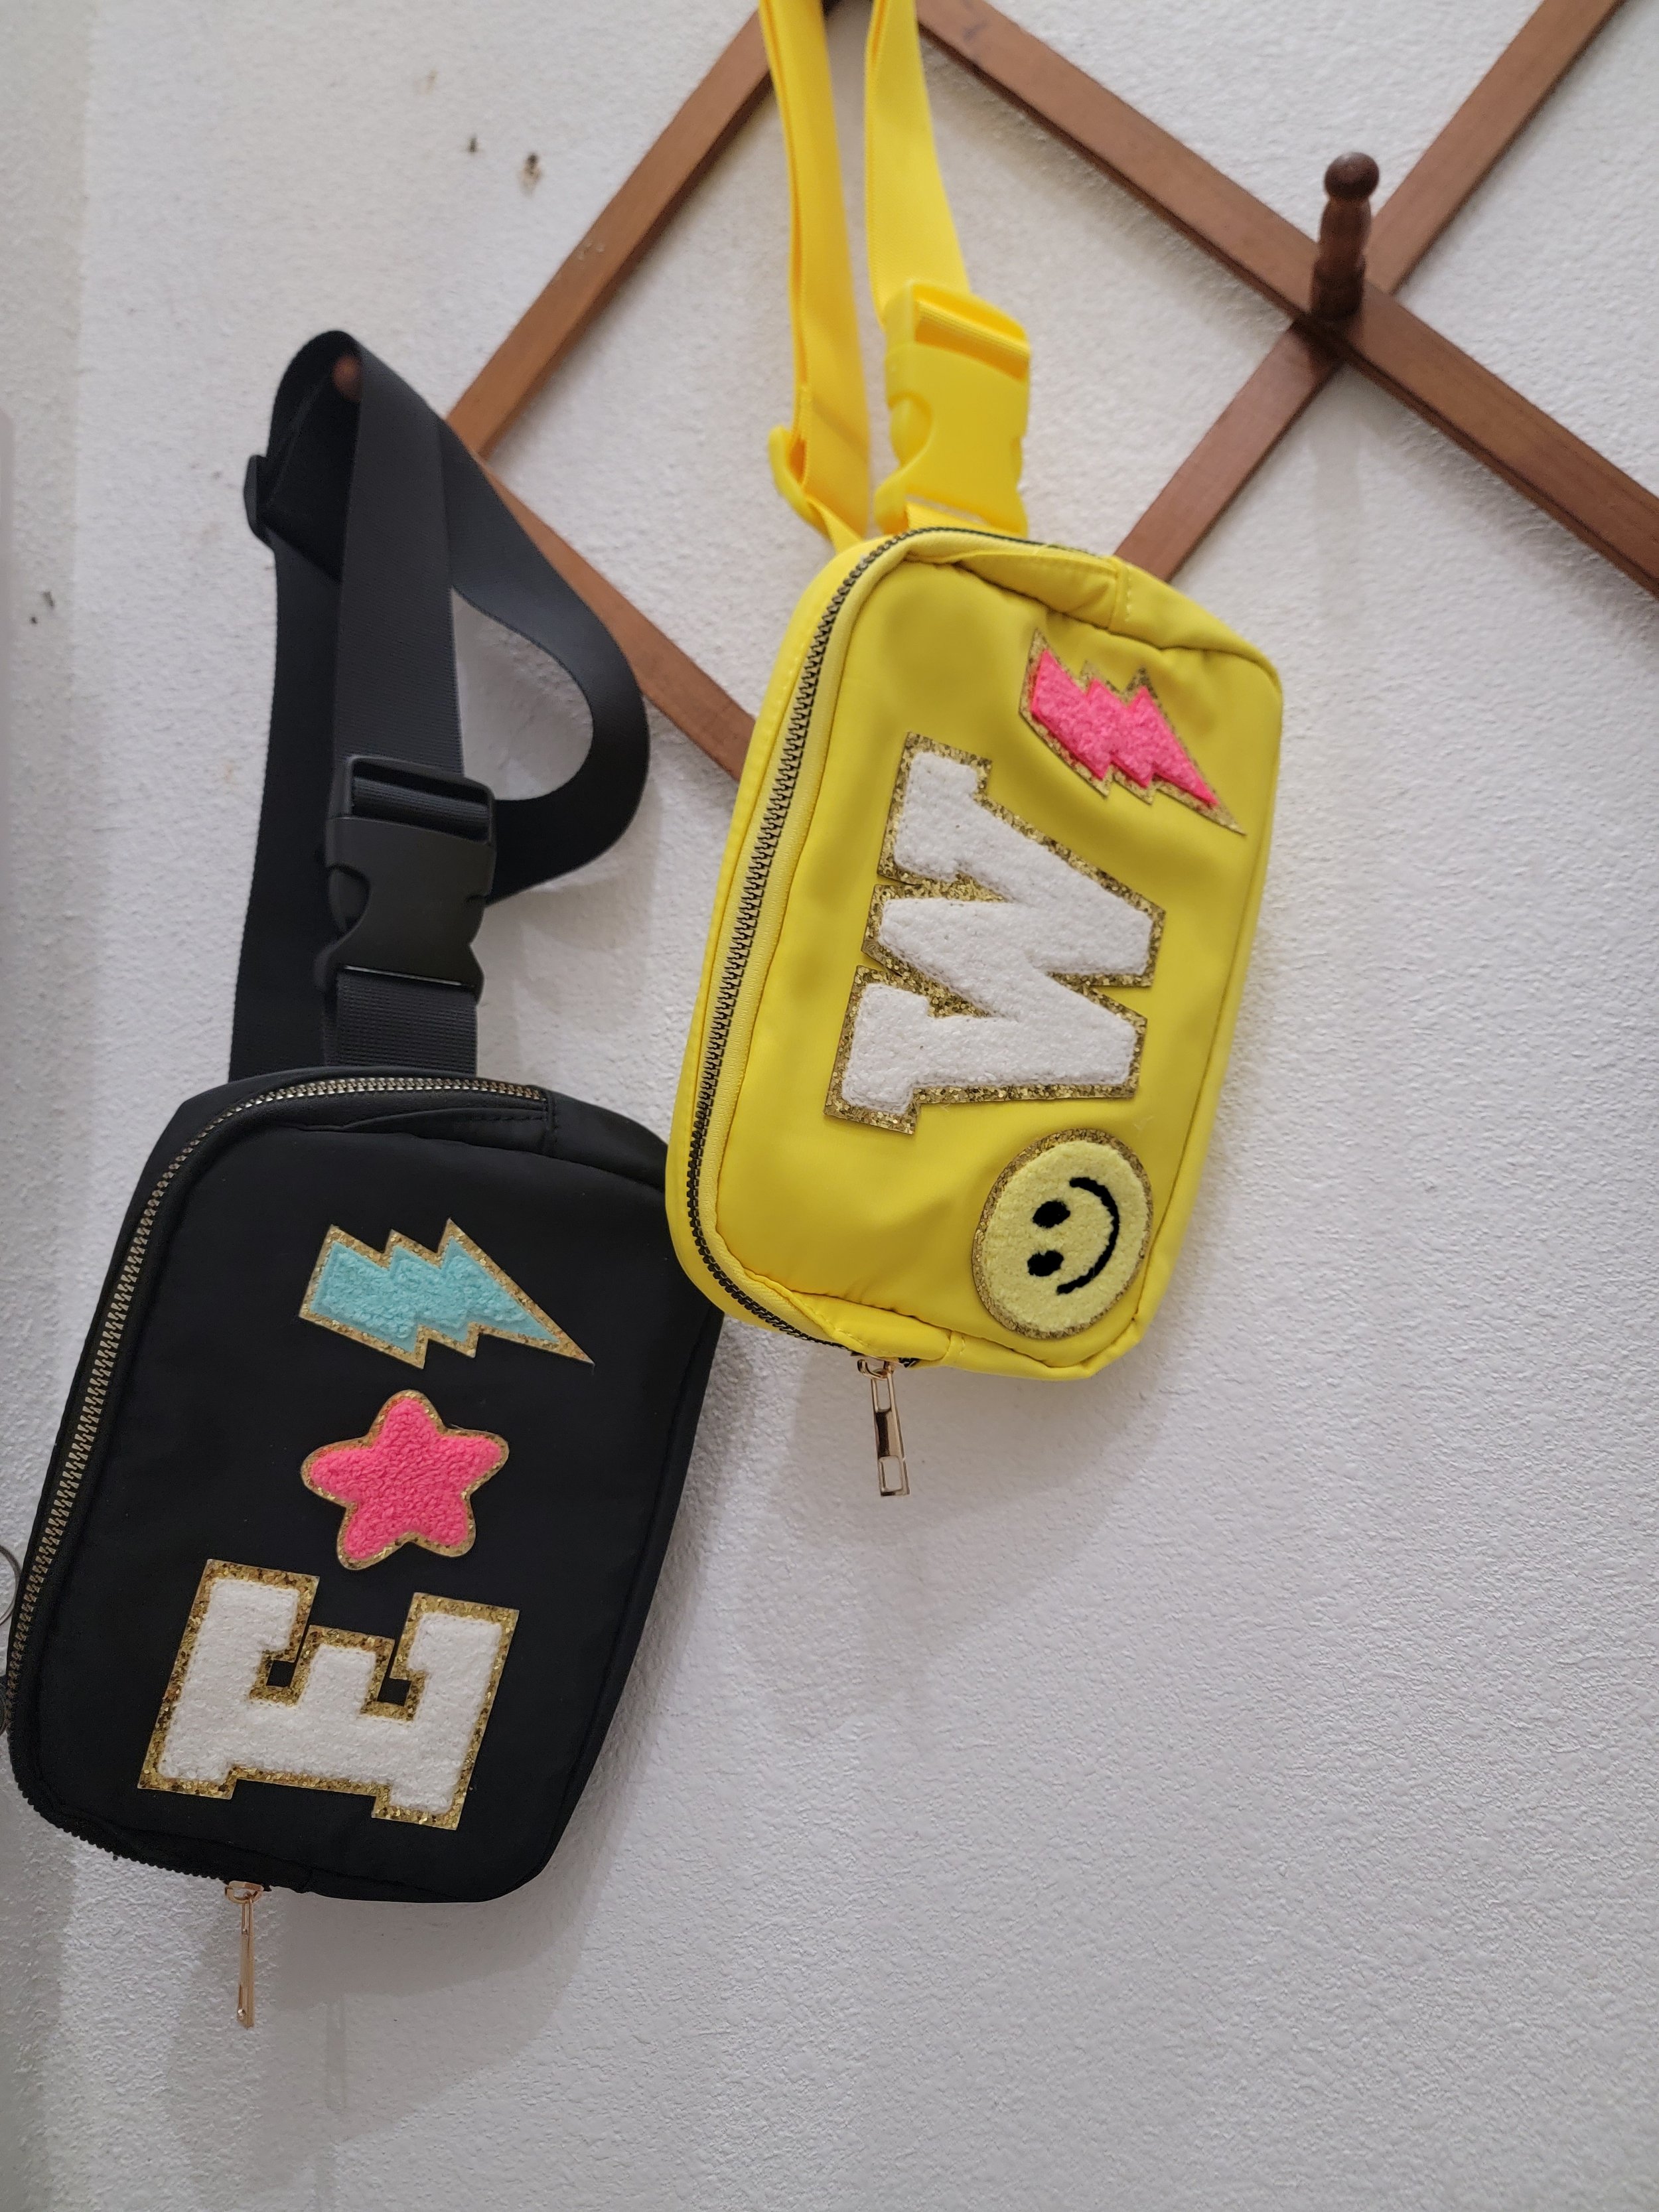
Chenille Letters: These colorful and fluffy letters added a playful touch to our creation. We carefully selected letters to spell out our names.
Colorful Shapes: We also picked out an assortment of colorful shapes, including hearts, stars, and flowers, to decorate the bag.
E6000 Craft Adhesive: To ensure a strong and lasting bond, we opted for E6000, a reliable craft adhesive known for its versatility and durability.
Design Your Layout
Before diving into gluing, we laid out our design on the belt bag. We wanted our initials to be the central focus, so we arranged the Chenille letters accordingly. Around our initials, we placed the colorful shapes to create a whimsical pattern.

Adhere the Chenille Letters and Shapes
With our design in place, we applied a small amount of E6000 adhesive to the back of each Chenille letter and shape. We carefully pressed them onto the belt bag, making sure they were secure.
Patience is Key
After adhering all the elements, we didn't rush this step; instead, we let the bag sit undisturbed for a full 24 hours to allow the adhesive to set and create a strong bond.
Putting Our Custom Belt Bag to the Test
Fast forward 24 hours, and our custom belt bag was ready for action! We decided to put it to the test during our cruise, where it proved to be the perfect companion. Not only did it keep our personal items conveniently close, but it also garnered compliments from fellow travelers who admired our unique creation.
A Versatile Accessory
What started as a craft project for our cruise quickly became a versatile accessory that I have exclusively used as my purse since July. It's incredible how a simple belt bag transformed into a fashion statement that I couldn't part with. It's become a part of my daily wardrobe, adding a fun and personalized touch to my outfits.
Craft Your Own Custom Belt Bag
If you're looking for a fun and creative project to do with your child or simply want to add a unique accessory to your collection, I highly recommend crafting your own custom belt bag. It's a delightful way to express your creativity, and the possibilities are endless.
Remember, you don't need to be a seasoned crafter to embark on this adventure. All you need is a bit of imagination, some craft supplies, and a willingness to have fun. So, gather your materials, unleash your creativity, and enjoy the process of transforming a simple belt bag into a personalized fashion statement.
I hope this crafty journey has inspired you to embark on your own creative adventures. Happy crafting, everyone! 🎨👜✨
Supply List
For the Belt Bag:
Belt Bag: This is the base of your project. Choose a belt bag that suits your style and needs.
For Personalization and Decoration:
Chenille Letters: Select Chenille letters in the colors and letters you desire to spell out your name or any word you like.
Colorful Shapes: Gather an assortment of colorful shapes such as hearts, stars, flowers, or any other decorative elements you prefer.
E6000 Craft Adhesive: Use E6000 craft adhesive for a strong and durable bond between the Chenille letters, colorful shapes, and the belt bag.
Optional:
Additional Decorative Elements: If you want to add more flair to your custom belt bag, you can consider additional decorative elements such as rhinestones, sequins, or fabric paint.
Crafting Tools: Depending on your chosen decorative elements, you may need crafting tools such as tweezers for precise placement or a small paintbrush if you decide to paint your bag.